I’m going to spare you the time of writing what everyone else wrote on this topic, but keep this link here for my own records. Awesome post about defining and using your own custom color palettes in Interface Builder:
Tag Archives: Interface Builder
UINavigationBar that Scrolls Away (Revised)
On this blog one of my most searched for posts is the one about a UINavigationBar that scrolls away.
That was written a while back. I’ve recently had to revisit this topic again, so I thought I’d revise my implementation, which aims to remove many caveats and just make it easy to drop into your code and you’re done.
So I redid that code and made it slightly less hacky, and implemented it as a category on UIVIewController. If it doesn’t work for you the only thing I can think of are the new properties on UIViewController that pertain to layout. Mine had automaticallyAdjustScrollViewInsets to YES, and extend edges under top bars.
//  UIViewController+ScrollyNavBar.h
//
//  Created by Stephen O'Connor on 24/03/16.
//  MIT License
//

/*

 How to use this:

 import this into your (probably) table view controller

 make sure you set HS_navigationBarLayerDefaultPosition in viewDidLoad:

 self.HS_navigationBarLayerDefaultPosition = self.navigationController.navigationBar.layer.position;

 optionally set HS_scrollingNavigationBarThresholdHeight if you want to be able to scroll a bit before
 the nav bar starts scrolling with it.  A typical use case would be if you want the bar to start
 scrolling with your first table view section, and not with the tableViewHeader.

 in viewWillAppear:, call:

 - (void)HS_updateNavigationBarPositionUsingScrollView:(UIScrollView*)scroller

 and, assuming your table view controller is still the UITableView's delegate, it's also
 a scroll view delegate.  In -scrollViewDidScroll:, call:

 - (void)HS_updateNavigationBarPositionUsingScrollView:(UIScrollView*)scroller

 as well.

 Done!


 */


#import <UIKit/UIKit.h>

@interface UIViewController (ScrollyNavBar)

@property (nonatomic, assign) CGFloat HS_scrollingNavigationBarThresholdHeight;  // defaults to 0.  I.e. think about tableViewHeader's height
@property (nonatomic, assign) CGPoint HS_navigationBarLayerDefaultPosition;

- (void)HS_updateNavigationBarPositionUsingScrollView:(UIScrollView*)scroller;

@end
Then then .m file:
// some theoretical knowledge here:  http://nshipster.com/associated-objects/

#import "UIViewController+ScrollyNavBar.h"
#import <objc/runtime.h>


@implementation UIViewController (ScrollyNavBar)

@dynamic HS_scrollingNavigationBarThresholdHeight;
@dynamic HS_navigationBarLayerDefaultPosition;

- (void)setHS_navigationBarLayerDefaultPosition:(CGPoint)HS_navigationBarLayerDefaultPosition {
    objc_setAssociatedObject(self,
                             @selector(HS_navigationBarLayerDefaultPosition),
                             [NSValue valueWithCGPoint:HS_navigationBarLayerDefaultPosition],
                             OBJC_ASSOCIATION_RETAIN_NONATOMIC);
}

- (CGPoint)HS_navigationBarLayerDefaultPosition {
    return [(NSValue*)objc_getAssociatedObject(self, @selector(HS_navigationBarLayerDefaultPosition)) CGPointValue];
}

- (void)setHS_scrollingNavigationBarThresholdHeight:(CGFloat)HS_scrollingNavigationBarThresholdHeight {
    objc_setAssociatedObject(self,
                             @selector(HS_scrollingNavigationBarThresholdHeight),
                             @(HS_scrollingNavigationBarThresholdHeight),
                             OBJC_ASSOCIATION_RETAIN_NONATOMIC);
}

- (CGFloat)HS_scrollingNavigationBarThresholdHeight {
    return [(NSNumber*)objc_getAssociatedObject(self, @selector(HS_scrollingNavigationBarThresholdHeight)) floatValue];
}

- (void)HS_updateNavigationBarPositionUsingScrollView:(UIScrollView*)scroller
{
    // get the navigation bar's underlying CALayer object
    CALayer *layer = self.navigationController.navigationBar.layer;
    CGFloat contentOffsetY = scroller.contentOffset.y;
    CGPoint defaultBarPosition = self.HS_navigationBarLayerDefaultPosition;
    CGFloat scrollingThresholdHeight = self.HS_scrollingNavigationBarThresholdHeight;

    // if the scrolling is not at the top and has passed the threshold, then set the navigationBar layer's position accordingly.
    if (contentOffsetY > -scroller.contentInset.top + scrollingThresholdHeight) {

        CGPoint newPos;
        newPos.x = layer.position.x;
        newPos.y = defaultBarPosition.y;
        newPos.y = newPos.y - MIN(contentOffsetY + scroller.contentInset.top - scrollingThresholdHeight, scroller.contentInset.top);

        layer.position = newPos;

    }
    else
    {
        layer.position = defaultBarPosition;  // otherwise we are at the top and the navigation bar should be seen as if it can't scroll away.
    }
}

@end
Boom! Pretty straightforward.
Note however, that I don’t really recommend this functionality because it’s prone to error, and it’s sort of hacking UINavigationBar. It has a few related consequences:
- UITableView section headers will still ‘stick’ to the bottom of the now invisible navigation bar.
- You must use a translucent UINavigationBar for this to really work properly.
Now, for the first of those two points, I don’t have a solution and anyone who does, please leave me something in the comments.
For the second one, if you read the API docs of UINavigationBar closely, you’ll see:
@property(nonatomic, assign, getter=isTranslucent) BOOL translucentDiscussion
The default value is YES. If the navigation bar has a custom background image, the default is YES if any pixel of the image has an alpha value of less than 1.0, and NO otherwise.
So, with a little trickery, we can just change the Class on a UINavigationController to use a custom UINavigationBar class that sets an *almost* opaque image as the background image any time you change the barTintColor:
#import "UIImage+NotQuiteOpaque.h"

@interface HSNavigationBar : UINavigationBar
@end

@implementation HSNavigationBar

- (void)awakeFromNib
{
    [self setBarTintColor:self.barTintColor];
}

- (void)setTranslucent:(BOOL)translucent
{
    NSLog(@"This HSNavigationBar must remain translucent!");
    [super setTranslucent:YES];
}

- (void)setBarTintColor:(UIColor *)barTintColor
{
    UIImage *bgImage = [UIImage HS_stretchableImageWithColor:barTintColor];
    [self setBackgroundImage:bgImage forBarMetrics:UIBarMetricsDefault];
}

@end
And you’ll see here that the real trick is this category on UIImage that generates a stretchable image of the color specified, but it sets the top right corner’s pixel alpha value to 0.99. I assume that nobody will notice that slight translucency in one pixel at the top right of the screen.
@implementation UIImage (NotQuiteOpaque)

+ (UIImage*)HS_stretchableImageWithColor:(UIColor *)color
{

    UIImage *result;

    CGSize size = {5,5};
    CGFloat scale = 1;

    CGFloat width = size.width * scale;
    CGFloat height = size.height * scale;
    CGColorSpaceRef colorSpace = CGColorSpaceCreateDeviceRGB();

    size_t bitsPerComponent = 8;
    size_t bytesPerPixel    = 4;
    size_t bytesPerRow      = (width * bitsPerComponent * bytesPerPixel + 7) / 8;
    size_t dataSize         = bytesPerRow * height;

    unsigned char *data = malloc(dataSize);
    memset(data, 0, dataSize);

    CGContextRef context = CGBitmapContextCreate(data, width, height,
                                                 bitsPerComponent,
                                                 bytesPerRow, colorSpace,
                                                 (CGBitmapInfo)kCGImageAlphaPremultipliedLast | kCGBitmapByteOrder32Big);

    CGFloat r, g, b, a;
    UIColor *colorAtPixel = color;

    r = 0, g = 0, b = 0, a = 0;

    for (int x = 0; x < (int)width; x++)
    {
        for (int y = 0; y < (int)height; y++)
        {
            if (x == (int)width - 1 && y == 0) {
                colorAtPixel = [color colorWithAlphaComponent:0.99f];  // top right
            }

            [colorAtPixel getRed:&r green:&g blue:&b alpha:&a];


            int byteIndex = (int)((bytesPerRow * y) + x * bytesPerPixel);
            data[byteIndex + 0] = (int)roundf(r * 255);    // R
            data[byteIndex + 1] = (int)roundf(g * 255);  // G
            data[byteIndex + 2] = (int)roundf(b * 255);  // B
            data[byteIndex + 3] = (int)roundf(a * 255);  // A

            colorAtPixel = color;
        }
    }

    CGColorSpaceRelease(colorSpace);
    CGImageRef imageRef = CGBitmapContextCreateImage(context);
    result = [UIImage imageWithCGImage:imageRef scale:scale orientation:UIImageOrientationUp];
    CGImageRelease(imageRef);
    CGContextRelease(context);
    free(data);

    result = [result resizableImageWithCapInsets:UIEdgeInsetsMake(2, 2, 2, 2) resizingMode:UIImageResizingModeStretch];

    return result;

}

@end
So, there it is. It works, yes, but not perfectly, and the whole thing feels a bit hacky. I wonder if there’s a better way to do this, or if in the future Apple will start to update this code. Seeing as we see collapsing address bars on WebView controllers like in Safari, perhaps they might abstract this further to support UINavigationControllers.
Stretchy Header UITableView (and how I hate hacks)
I really dislike using a UIViewController subclass to make fundamental functionality of a UIView work. That said, I will do what needs doing to get the job done. Sometimes there are no other obvious ways to do something non-typical.
Recently I looked for code that could help me recreate “stretchy header” functionality. And I found some here. It wasn’t a bad approach. It worked. But somehow seemed a bit brittle, or for a very specific use-case. It was adjusting contentInset depending on contentOffset value. That seemed sub-optimal.
I’m currently working on a UITableViewController subclass that should be configurable to have stretchy headers, expandable section headers (see previous post), and scrollable navigation bars (also a post of mine from 2012… will finally (soon) get a fresh coat of paint).
Anyway, I found the easiest way to make stretchy header views. Simply, you have to subclass UITableView and make sure your UITableViewController subclass uses an instance of it and not of a standard UITableView. The advantage here is that you don’t need to change any view controller code, so you don’t have issues associated with class inheritance.
Enough talk. Here’s the code. You can try it for yourself.
//  HSStretchyHeaderTableView.h
//  TableViewSandbox
//
//  Created by Stephen O'Connor on 23/03/16.
//  MIT License.
//

#import <UIKit/UIKit.h>

IB_DESIGNABLE
@interface HSStretchyHeaderTableView : UITableView

@property (nonatomic, assign, getter=hasStretchyHeader) IBInspectable BOOL stretchyHeader;

@end
And now the .m file:
#import "HSStretchyHeaderTableView.h"

@interface HSStretchyHeaderTableView()
{
    CGFloat _headerViewHeight;
}
@end

@implementation HSStretchyHeaderTableView

- (void)awakeFromNib
{
    // NOTE, You will have to modify this solution if you don't use InterfaceBuilder!
    _headerViewHeight = self.tableHeaderView.bounds.size.height;
}

- (void)layoutSubviews
{
    [super layoutSubviews];

    if (self.hasStretchyHeader)
    {
        CGRect headerFrame = self.tableHeaderView.frame;

        if (self.contentOffset.y  _headerViewHeight)
        {
            headerFrame.origin.y = 0;
            headerFrame.size.height = _headerViewHeight;
            self.tableHeaderView.frame = headerFrame;
        }
    }
}

@end
Pretty easy! Happy coding!
Cheat Sheet – IB_DESIGNABLE Views
Not so much a cheat sheet, but a general procedure to follow. Consider this class, a UILabel that draws an outline around it that you can customize and more importantly, view from Interface Builder:
#import

IB_DESIGNABLE
@interface HSOutlinedLabel : UILabel

@property (nonatomic, assign) IBInspectable CGFloat outlineWidth;
@property (nonatomic, assign) IBInspectable UIColor *outlineColor;
@property (nonatomic, assign) IBInspectable CGFloat cornerRadius;

@property (nonatomic, assign) IBInspectable CGPoint padding;  // between the text and outline

@end
and then the .m
#import "HSOutlinedLabel.h"

@implementation HSOutlinedLabel

- (instancetype)initWithCoder:(NSCoder *)aDecoder
{
    self = [super initWithCoder:aDecoder];
    if (self) {

        [self _commonInit];
    }
    return self;
}

- (void)_commonInit
{
    // gets called first (initWithCoder:), before any of the settings in IB are used.
    self.layer.masksToBounds = YES;
    _outlineWidth = 0;
    _outlineColor = nil;
    _cornerRadius = 5;
    _padding = CGPointZero;
    self.layer.cornerRadius = _cornerRadius;

}

- (void)prepareForInterfaceBuilder
{
    // careful!  this will overwrite any settings in Interface Builder.
    // it's meant for setting values that perhaps aren't IBInspectable
    [super prepareForInterfaceBuilder];
}

- (void)awakeFromNib
{
    if (_outlineWidth > 0) {
        self.layer.borderWidth = _outlineWidth;

        if (_outlineWidth > 0) {
            self.layer.borderColor = _outlineColor ? _outlineColor.CGColor : NULL;
        }
        else
        {
            self.layer.borderColor = NULL;
        }
    }
}

#pragma mark - Setters (Are used by Interface Builder)

// NOTE:  Interface Builder calls setValue:forKey: when you change
// an inspectable value.  If you are purely drawing your UIView subclass
// with -drawRect: then these changes update.
// However, if you see the setters below, I use the IBInspectables
// to ultimately wrap CALayer properties.  If you want your view to
// draw correctly,  you need to write accessors for any IBInspectable
// that triggers changes to any object that won't necessarily be done
// in drawRect:

- (void)setOutlineWidth:(CGFloat)outlineWidth
{
    if (_outlineWidth != outlineWidth) {
        _outlineWidth = outlineWidth;
        self.layer.borderWidth = outlineWidth;
    }
}

- (void)setOutlineColor:(UIColor *)outlineColor
{
    if (_outlineColor != outlineColor) {
        _outlineColor = outlineColor;
        self.layer.borderColor = outlineColor.CGColor;
    }
}

- (void)setCornerRadius:(CGFloat)cornerRadius
{
    if (_cornerRadius != cornerRadius) {
        _cornerRadius = cornerRadius;
        self.layer.cornerRadius = cornerRadius;
    }
}

- (void)setPadding:(CGPoint)padding
{
    if (!CGPointEqualToPoint(_padding, padding)) {
        _padding = padding;
        [self invalidateIntrinsicContentSize];
    }
}

- (CGSize)intrinsicContentSize
{
    CGSize size = [super intrinsicContentSize];
    size.width += 2 * _padding.x;
    size.height += 2 * _padding.y;

    return size;
}

@end
I just meant this to be a starting point for your own work. And actually a reminder for myself.
UITableView with Animating Section Header
So, I’ve been scratching my head on an issue I’ve been having:
I want to have a UITableView with a section header, because I want it to stick to the top of the screen while scrolling. The thing is, it’s supposed to have a search bar that expands when you enter “search mode”.
What you see in the video is my prototype. Tapping a table cell is supposed to toggle this search mode on and off. In the video above you see that that table cell layout updates and expands, but the section header seems to be “one click behind” and expands when the cell layouts push up because they think the header is shorter.
This behaviour happened via the standard posts on stack overflow. Here, for example.
Now, perhaps my issue is because I also have a stretchy section header, which I based off of this post:
Anyway, I found the solution involved a slightly complicated solution, but once it’s in place, there’s little to know (i, ii, iii, …) and do (A, B, C, D, …) :
i) I assume you will have one section on your table view
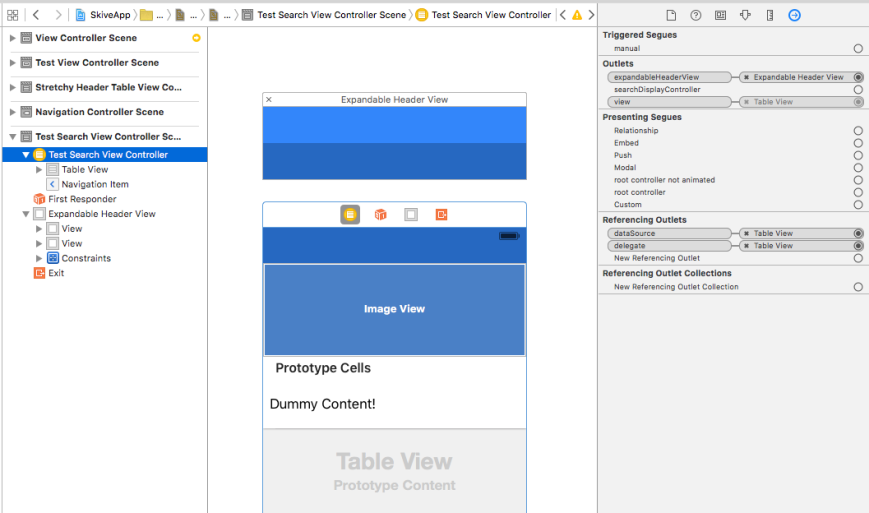
A) Define an associated view on your view controller, which will be your “expandableHeaderView” (more on the specifics later)
B) Define your class to have such properties and methods:
IB_DESIGNABLE
@interface QLExpandableSectionHeaderTableViewController : UITableViewController

@property (nonatomic, assign) IBInspectable NSInteger expandableSectionHeaderInactiveHeight;  // defaults to 44
@property (nonatomic, assign) IBInspectable NSInteger expandableSectionHeaderActiveHeight; // defaults to 88

@property (nonatomic, strong) IBOutlet UIView *expandableHeaderView;

@property (nonatomic, readwrite, getter=isHeaderExpanded) BOOL headerExpanded;

- (void)setSectionHeaderHeightExpanded:(BOOL)expanded animated:(BOOL)animated;

@end


@implementation QLExpandableSectionHeaderTableViewController

- (instancetype)initWithCoder:(NSCoder *)aDecoder
{
    self = [super initWithCoder:aDecoder];
    if (self) {
        _expandableSectionHeaderInactiveHeight = 44.f;
        _expandableSectionHeaderActiveHeight = 88.0f;
    }
    return self;
}

- (void)viewDidLoad {
    [super viewDidLoad];

    if (!self.expandableHeaderView) {
        NSLog(@"WARNING: You haven't provided an associated header view you want to use when toggling section header height!");
    }
    else
    {
        // this has to be clear, since animation doesn't quite work as desired.
        self.expandableHeaderView.backgroundColor = [UIColor clearColor];
    }
}


- (CGFloat)tableView:(UITableView *)tableView heightForHeaderInSection:(NSInteger)section
{
    if (section == 0) {
        if (self.isHeaderExpanded) {
            return self.expandableSectionHeaderActiveHeight;
        }
        return self.expandableSectionHeaderInactiveHeight;
    }

    return 0;
}

- (UIView*)tableView:(UITableView *)tableView viewForHeaderInSection:(NSInteger)section
{
    if (section == 0) {

        if (self.expandableHeaderView) {
            return self.expandableHeaderView;
        }
        else
        {
            // will probably never get used
            UIView *header = [UIView new];
            header.backgroundColor = [UIColor redColor];
            header.frame = CGRectMake(0, 0, self.tableView.bounds.size.width, self.expandableSectionHeaderInactiveHeight);
            return header;
        }
    }


    return nil;
}

- (void)toggleSectionHeader:(UIButton*)button
{
    if (self.isHeaderExpanded) {
        [self setSectionHeaderHeightExpanded:NO animated:YES];
    }
    else {
        [self setSectionHeaderHeightExpanded:YES animated:YES];
    }
}

- (void)setSectionHeaderHeightExpanded:(BOOL)expanded animated:(BOOL)animated
{
    if (self.isHeaderExpanded && expanded) {
        return;  // nothing to do!
    }

    self.headerExpanded = expanded;
    [self.tableView beginUpdates];
    [self.tableView endUpdates];

    //NSLog(@"%@", self.searchHeaderView.constraints);
    __block NSLayoutConstraint *headerHeightConstraint = nil;
    [self.expandableHeaderView.constraints enumerateObjectsUsingBlock:^(__kindof NSLayoutConstraint * _Nonnull obj, NSUInteger idx, BOOL * _Nonnull stop) {

        // I determined this name by logging the self.searchHeaderView.constraints and noticed
        // it had a constant value that was one of my searchBar(In)activeHeight values.
        if ([obj.identifier isEqualToString:@"UIView-Encapsulated-Layout-Height"]) {
            headerHeightConstraint = obj;
            *stop = YES;
        }
    }];

    CGFloat newHeight = expanded ? self.expandableSectionHeaderActiveHeight : self.expandableSectionHeaderInactiveHeight;
    headerHeightConstraint.constant = newHeight;

    // after the animation completes, the expandableHeaderView's frame doesn't change until a layout update
    // , which only happens after you start scrolling.  This will ensure it has the right size as well.
    CGRect frame = self.expandableHeaderView.frame;
    frame.size.height = newHeight;

    [UIView animateWithDuration:animated ? 0.3f : 0.0f
                          delay:0.0f
                        options:UIViewAnimationOptionCurveEaseInOut
                     animations:^{
                         [self.tableView layoutIfNeeded];
                     } completion:^(BOOL finished) {
                         self.expandableHeaderView.frame = frame;
                     }];

}
The code above will handle animation. There is still some weirdness happening on the UIKit side of things, because the the header view’s subviews animate according to auto-layout, but the self.expandableHeaderView doesn’t visually change size until a layout update occurs. And this only occurs once you start scrolling. So we set that frame to the size it’s supposed to have, and that sorts it all out. As a result, we have to set the self.expandableHeaderView.backgroundColor = [UIColor clearColor];
And that solved the problem! It’s a bit hacky, but I found no other way to accomplish this that isn’t THAT ugly.
And here’s the result:
IB_DESIGNABLE UIView using a custom CALayer (for animations)
I’m a very visual person. If I can use Interface Builder, I do. I like it mainly for the separation of concerns, and really who doesn’t like a WYSIWYG way of inspecting your UI ??
So, I had a somewhat unique scenario in that I want to have a UIView that has a custom CALayer that has properties I can animate. (See here for some background on that, though I will touch on it below: https://www.objc.io/issues/12-animations/animating-custom-layer-properties/ )
But I also want to be able to configure these properties in Interface Builder via the Inspector pane.
I found a way to do this, although it’s tedious. In short, you have to define a custom layer, deal with it’s display and animation, and wrap the layer properties on your UIView subclass.
What? Fine. Here’s the simplified code to show you how it would work for something like a custom progress bar:
//  HSProgressView.h
//  Created by Stephen O'Connor on 17/02/16.
//  MIT License.

#import <UIKit/UIKit.h>

IB_DESIGNABLE
@interface HSProgressView : UIView

@property (nonatomic, assign) IBInspectable CGFloat progressValue;  // clamps between 0...1
@property (nonatomic, strong) IBInspectable UIColor *barColor;

- (void)setProgressValue:(CGFloat)progress animated:(BOOL)animated;

@end
And the .m file
//  HSProgressView.m
//  Created by Stephen O'Connor on 17/02/16.
//  MIT License.


#import "HSProgressView.h"

@interface HSProgressView()

+ (NSArray*)customLayerProperties;

@end

// HERE WE DEFINE A LAYER THAT IDEALLY WE'D PREFER TO DO IN
// A UIView SUBCLASS IN drawRect:, BUT TO LEVERAGE THE ANIMATION
// PROPERTIES OF COREANIMATION, WE DEFINE THEM IN A CALayer THEN
// WRAP THEM
@interface _HSProgressViewLayer : CALayer

@property (nonatomic, assign) CGFloat progressValue;
@property (nonatomic, strong) UIColor *barColor;

@end


@implementation _HSProgressViewLayer

// these methods are generated at runtime
@synthesize progressValue, barColor;

+ (BOOL)needsDisplayForKey:(NSString *)key
{
    // HERE WE SAY IF ANY OF THESE PROPERTIES CHANGE,
    // SHOULD IT REDRAW THE LAYER

    // I JUST SAY YES FOR ALL OF MY CUSTOM PROPERTIES
    // BUT YOU CAN CONTROL THIS HERE
    for (NSString *propertyName in [HSProgressView customLayerProperties]) {
        if ([key isEqualToString:propertyName]) {
            return YES;
        }
    }

    return [super needsDisplayForKey:key];
}


// THIS IS WHERE YOU DEFINE WHICH PROPERTIES CAN BE ANIMATED
// AND HOW.  Duration, timing, etc.
// In our case, we only want to animate progress, but not color
- (id)actionForKey:(NSString *)key
{
    // if (key corresponds to a property name I want to animate...)
    if ([key isEqualToString:@"progressValue"])
    {
        CABasicAnimation *animation = [CABasicAnimation animationWithKeyPath:key];
        animation.timingFunction = [CAMediaTimingFunction functionWithName:kCAMediaTimingFunctionLinear];

        if ([key isEqualToString:@"progressValue"])
        {
            // LOOK HERE!  It's outlined in that post listed above, but
            // if you animate, you need to look to the presentationLayer
            // as it holds the currentValue *right now* or *on screen*
            // if you didn't call presentationLayer, the progress
            // value is going to be the value you are trying to animate to
            // and you would see nothing!


            animation.fromValue = @([self.presentationLayer progressValue]);
        }

        // other animatable properties  here...

        return animation;
    }
    return [super actionForKey:key];
}

- (void)display
{
    // again, takes the value that it currently is animating to,
    // if you called self.progress it would always return the final value.

    // that being said, if we want to inspect it in interface builder
    // we have to omit animation and just look at the value it 'wants' to be
    CGFloat progress;
#if !TARGET_INTERFACE_BUILDER
    progress = [self.presentationLayer progressValue];
#else
    progress = [self progressValue];
#endif


    //create drawing context
    UIGraphicsBeginImageContextWithOptions(self.bounds.size, NO, 0);

    // backgroundColor is a property on CALayer, but we still need to draw him!
    CGContextRef ctx = UIGraphicsGetCurrentContext();
    CGContextSetFillColorWithColor(ctx, self.backgroundColor);
    CGContextFillRect(ctx, self.bounds);


    // now for our custom properties
    UIBezierPath *path;

    CGRect drawRect = self.bounds;
    drawRect.size.width = MAX(0, MIN(1, progress)) * drawRect.size.width;

    path = [UIBezierPath bezierPathWithRect:drawRect];
    [self.barColor setFill];
    [path fill];

    //set backing image
    self.contents = (id)UIGraphicsGetImageFromCurrentImageContext().CGImage;
    UIGraphicsEndImageContext();
}

@end


static NSArray *HSProgressViewLayerProperties = nil;

@implementation HSProgressView

+ (Class)layerClass
{
    return [_HSProgressViewLayer class];
}

+ (NSArray*)customLayerProperties
{
    if (!HSProgressViewLayerProperties) {

        HSProgressViewLayerProperties = @[
                                          @"barColor",
                                          @"progressValue"
                                          ];
    }
    return HSProgressViewLayerProperties;
}

#pragma mark - Generic Accessors

// we wrap the properties on the layer, so we override this
// for integration into Interface Builder's IBInspectable properties

- (void)setValue:(id)value forKey:(NSString *)key
{
    for (NSString *propertyName in [HSProgressView customLayerProperties]) {
        if ([key isEqualToString:propertyName]) {

            [self.layer setValue:value forKey:key];

            return;
        }
    }
    [super setValue:value forKey:key];
}

- (id)valueForKey:(NSString *)key
{
    for (NSString *propertyName in [HSProgressView customLayerProperties]) {
        if ([key isEqualToString:propertyName]) {
            return [self.layer valueForKey:key];
        }
    }
    return [super valueForKey:key];
}

#pragma mark - Public Methods

- (void)setProgressValue:(CGFloat)progress animated:(BOOL)animated
{
    // if animated is yes, it gets it's information about how to
    // animate it via actionForKey: on the custom layer implementation!

    if (!animated) {
        [CATransaction begin];
        [CATransaction setDisableActions:YES];
    }

    _HSProgressViewLayer *layer = (_HSProgressViewLayer*)self.layer;
    layer.progressValue = progress;

    if (!animated) {
        [CATransaction commit];
    }
}

#pragma mark - Layer-backed Accessors

// SADLY WE HAVE TO WRITE A LOT OF BORING CODE HERE TO WRAP THE ACCESSORS.
// IF SOMEONE KNOWS BETTER, PLEASE TELL!
- (void)setProgressValue:(CGFloat)progressValue
{
    [self setProgressValue:progressValue animated:NO];
}

- (void)setBarColor:(UIColor *)barColor
{
    _HSProgressViewLayer *layer = (_HSProgressViewLayer*)self.layer;
    layer.barColor = barColor;
}

- (UIColor*)barColor
{
    _HSProgressViewLayer *layer = (_HSProgressViewLayer*)self.layer;
    return layer.barColor;
}

- (CGFloat)progressValue
{
    _HSProgressViewLayer *layer = (_HSProgressViewLayer*)self.layer;
    return layer.progressValue;
}


#pragma mark - Layout and Drawing

- (void)layoutSubviews
{
    [super layoutSubviews];
    self.layer.bounds = self.bounds;
    [self.layer setNeedsDisplay];  // because the layer follows the size of the view, whose contents fill the view's frame.
}

@end
There it is! Copy-paste this into your own class and try it out in Interface Builder. Now you should see how you can extend this for your own purposes.
Proportionally Sized Views, Views that inherit backgroundColor
So, I’m a bit of a late adopter. The problem with working intensively on a project that is grossly understaffed is that you don’t have time to keep up with all the technology. So just now am I getting a deeper understanding of Autolayout on iOS.
There is no way to avoid using Autolayout, so if you haven’t started using it, please do! The various screen sizes of the various iPhones, not to mention multi-tasking on iPad will basically demand you use it.
I’ve run into a situation where I might design some elements for iPhone 5s, but on iPhone 6 they could be bigger. I don’t like the complexity of Size classes, and don’t even think they work very well for the different iPhones. I think it was a way to make one layout work on iPhone and iPad. Hmm… the topic here.
On my latest project I found two things that I needed. So I built them. I wanted a UI Element (a UIView) to always maintain a certain proportion of its superview. Say 75% of the screen width. I didn’t know how to do this in Autolayout. (I suspect it might have something to do with Multipliers??)
Anyway, I also wanted to be able to define a view that would just inherit the background color of its superview. This makes it easier to make changes later in Interface Builder without having to go and alter the whole view hierarchy by hand, or to make outlets for all those views and change them in code.
Well, try for yourself. Here’s the code:
// HSProportionallySizedView.h
//
// Created by Stephen O'Connor on 30/09/15.
// Copyright © 2015 Iconoclasm Spasms. All rights reserved.
// Actually, MIT License. Hack to your heart's content!

#import <UIKit/UIKit.h>

extern CGFloat const HSProportionallySizedViewNoEffect;

@interface HSProportionallySizedView : UIView

@property (nonatomic, assign) IBInspectable BOOL inheritsBGColor;  // default: NO

// between 0...1.f. Defaults to HSProportionallySizedViewNoEffect
@property (nonatomic, assign) IBInspectable CGFloat widthProportion;
@property (nonatomic, assign) IBInspectable CGFloat heightProportion;

@end
//  HSProportionallySizedView.m
//
//  Created by Stephen O'Connor on 30/09/15.
//  Copyright © 2015 Iconoclasm Spasms. All rights reserved.
//  Actually, MIT License.  Hack to your heart's content!

#import "HSProportionallySizedView.h"

CGFloat const HSProportionallySizedViewNoEffect = -1.f;

@implementation HSProportionallySizedView

- (void)willMoveToSuperview:(UIView *)newSuperview
{
    if (self.inheritsBGColor) {
        self.backgroundColor = newSuperview.backgroundColor;
    }
}

- (void)awakeFromNib
{
    if (self.inheritsBGColor && self.superview) {
        self.backgroundColor = self.superview.backgroundColor;
    }
}

- (void)makeDefaultValues
{
    _inheritsBGColor = NO;
    _widthProportion = HSProportionallySizedViewNoEffect;
    _heightProportion = HSProportionallySizedViewNoEffect;
}

- (instancetype)initWithFrame:(CGRect)frame {
    if (self = [super initWithFrame:frame]) {
        [self makeDefaultValues];
    }
    return self;
}

- (instancetype)initWithCoder:(NSCoder *)aDecoder {
    if (self = [super initWithCoder:aDecoder]) {
        [self makeDefaultValues];
    }
    return self;
}

- (CGSize)intrinsicContentSize
{
    CGSize size = [super intrinsicContentSize];
    if (self.superview) {

        if (_widthProportion != HSProportionallySizedViewNoEffect) {

            CGFloat proportionalWidth = MAX(0, MIN(1, _widthProportion));

            if (proportionalWidth == 0) {
                NSLog(@"One of your proportional size values is set to 0!!");
            }
            size.width = proportionalWidth * self.superview.bounds.size.width;
        }

        if (_heightProportion != HSProportionallySizedViewNoEffect) {

            CGFloat proportionalHeight = MAX(0, MIN(1, _heightProportion));
            if (proportionalHeight == 0) {
                NSLog(@"One of your proportional size values is set to 0!!");
            }
            size.height = proportionalHeight * self.superview.bounds.size.height;
        }

    }
    return size;
}

@end
You can see that with the default values it behaves exactly like a UIView. So it makes a suitable baseclass in your codebase.
NOTE: I’m sure there’s a way to do the proportional size in Autolayout without this, so please help me in the comments!
Custom UITableViewHeaderFooterView with Interface Builder
So, one area that Apple needs to tighten up as it’s not clear and the Internet is also a bit divided on is setting up UITableViewHeaderFooterView objects in Interface Builder. Now, sadly you can’t do this in a table view in a Storyboard much like you’d design a prototype cell. No, but there are still ways to visually design these and write minimal code.
So you will have to subclass UITableViewHeaderFooterView and override -(UIView*)contentView. That’s the jist of it. You probably have to subclass it anyway because you have custom content!
@implementation MySettingsHeaderView
- (UIView*)contentView
{
  return self.subviews[0];
}
@end
And then create a View NIB file, where the root view’s class is set to this above. The trick is that the first subview is going to be the contentView of the UITableViewHeaderFooterView, but strangely it is a readonly property. So that’s why you need to override.

So treat this view as the contentView and add everything to that. This way you can preserve AutoLayout stuff and avoid warnings like:
Setting the background color on UITableViewHeaderFooterView has been deprecated. Please use contentView.backgroundColor instead
Then, all you do is in your viewDidLoad method, you put something like:
[self.tableView registerNib:[UINib nibWithNibName:@"MySettingsHeaderView" bundle:nil] forHeaderFooterViewReuseIdentifier:@"MyHeaderIdentifier"]; // though, be a good coder, and don't pass a hard-coded string, but define a constant for your header identifier!!
Boom! I love you too.
My Most Used Code Snippet in Xcode
It’s good to get in the habit of having good habits. 🙂
A lot of people write custom UIView code but then have trouble debugging a few things. Mostly pertaining to writing it to be initialized in code, then they initialize it in Interface Builder. As such, I just use the following snippet and it saves me a lot of boilerplate.
- (id)initWithFrame:(CGRect)frame
{
    self = [super initWithFrame:frame];
    if (self) {
        [self configureView];
    }
    return self;
}

- (id)initWithCoder:(NSCoder *)aDecoder
{
    self = [super initWithCoder:aDecoder];
    if (self) {
        [self configureView];
    }
    return self;
}

- (void)configureView
{
  // common initialization
}
That’s it for today.
Why I DO use Interface Builder – A rebuttal
If you are not familiar with this post on why an accomplished Developer does not use Interface Builder, I suggest you read it before reading this post.
I’d like to weigh in on the subject as some of the points shouldn’t – in my view – carry as much weight as maybe he would like them to in that post. It’s not my intention to start a flame war, but I do have a vested interest in there being programmers who use Interface Builder, and ultimately I think that those who are against it just aren’t yet used to it or have understood what a powerful tool it can be.
Choosing Explicit over Implicit
Choosing to be explicit is my number one reason to do things in code instead … they can see right away where everything is and not have to wonder if this file has a NIB.
If you keep your project folders organized such that a folder has a .h/.m/.xib for your object then this is really a non-issue.
I have spent countless hours searching for the source of a bug only to discover it’s some checkbox in one of the half dozen inspectors in Interface Builder. If it was in code, it’s simple to glance at the view code and see the source of the problem much quicker.
If you like writing a lot of boring code to set properties that you can do in a second (and change later just as easily) then do it. This is really a matter of style. Interface Builder is just a part of a toolchain. I also am a very visual person, so I have a better overview of what’s happening with a NIB. Most of the time you are dealing with 2 inspectors. The “I can see it all in code” argument only really applies if you already know what the default properties are supposed to be; so again, you had a learning curve with that.
Tight Coupling
It is much harder to use Interface Builder for reusable views….
I don’t really understand the meaning of this. I’m starting to suspect that it’s just a matter of experience. Perhaps part of you just doesn’t want to embrace it? As an iOS coder, I ‘grew up’ with it, so can’t understand why people don’t want to use it. (If you want to know how to easily create reusable instances of a UIView from a NIB)
Not to mention, if you use lots of custom views, your NIBs will just be a bunch of invisible boxes. So now you have this tight coupling that is even harder to work with if you were to just lay it out in code.
Did you know about this? There are a lot of runtime attributes for your custom classes you can set up in IB. Also, it’s a tool to build view hierarchies. I don’t know what this argument really is. I really don’t understand how using IB is any tighter coupling than in code, because it’s a code generation tool. In fact, getting your programmers to use it could guarantee that they adhere to a Model-View-Controller pattern precisely because they are prevented from writing too much view code beyond keeping their views vapid and vain; IB helps ensure that.
Have you ever sat staring at some code wondering why it’s not working, only to realize you didn’t connect the outlet or action? I hate that.
I don’t know what to say here. Programmer error? Rookie mistake? I’ve been there too at some point. It’s just a learning curve. Don’t you hate it when an app crashes and you don’t know how to debug it? I hate that too. 😉 It should just work like I imagined it. I will concede that there have been times where I have forgotten to set the delegate, but now I know that this is a source of error once I notice the methods not being called. I guess one can chalk it up to experience.
Working With Others
Have you ever had a merge conflict in a NIB. It’s the worst…. if it gets automatically merged wrong, you might not notice until runtime. With code, you can read the diff and understand what’s happening.
This is where I definitely concede with you, but this is in my experience not a big deal. How many developers does it really take to position objects on a screen? I’ve never been on a project where a developer has said “hey dude, are you done with the NIB file yet?” (Storyboards not included.)
It’s Part of Xcode
Xcode is not the most stable piece of software in the world. The text editing part works pretty well. Every time I get a crash while editing a NIB, I grumble to myself and wish it was code even more. The less I have to use Xcode for more than anything except a text editor with completion and a compiler, the happier I am.
Two things; it sounds like you just don’t WANT to like Interface Builder, and two, you’re not one of those VIM guys, are you? 🙂 Anyway, if you don’t like Xcode, you might try AppCode if you’re not using it already.
Location, Location, Location
Layout code is not hard. Trying to work with auto-layout in Interface Builder is maddening … it’s so simple to just override
layoutSubviewsand do your thing.
True, and true. Let’s not forget that time is of the essence, so spending time writing lines of code that can otherwise be set with a mouse-click is a task for people working jobs with big budgets. For the rest of us, anything that will speed up the amount we can get done (well!) is appreciated.
You can simply reuse your code instead of create this tight coupling.
I still don’t understand how you think there’s tight coupling going on. But anyway, with IB I set the rough position and the auto-resize properties, then do the rest in layoutSubviews as well. Screw Autolayout. I don’t know anyone using it, or who has a real use-case for it.
Bottom Line
Interface Builder itself is not bad.
Agreed.
It does encourage bad practices…
I completely disagree, and still haven’t found where you’ve made your argument for this, sorry!
…prevents reusability (making working with others more difficult)…
How? I just don’t see your argument here. It gets compiled into code. A chunk of code with an interface (outlets and actions).
…and slows your workflow.
If this were true, why would it exist?
Personally, I avoid using Interface Builder (including storyboards) as much as possible. All of the projects I’ve worked on since 2009 haven’t had NIBs unless it was out of my control.
Storyboards are a slightly different topic that I’ll just leave alone. I don’t use them either because I actually want to write controller code, and I think Storyboards take too much of that away, but feel free someone on the interwebs to dispute that.
I think you should save yourself some time, learn a few things, and start moving to code. We are programmers after all.
We are creative people who solve problems, we programmers. If you were a carpenter, you could saw everything by hand and talk about the purity of your craft, or you could get yourself a fancy woodshop and produce products at a faster speed. So, your job as a programmer is to build something, and build it well in the quickest amount of time possible. If you think this is best accomplished without Interface Builder, then that’s your right. But ultimately all I can say about the “I can’t see what’s happening” and “it slows my workflow” arguments is that you just need to gain some experience with it. I think it’s a fantastic tool that helps one get an overview of what it’s going to look like at runtime, and saves one having to write a lot of boring code. You can even drag elements onto your .h/.m files and it will automatically create the outlets for you. So much LESS typing, allowing you to focus on interesting parts of your application.
If you really are against Interface Builder, then I suggest having a look at DCIntrospect, a very very handy tool that allows you to tweak your view hierarchy (especially frame positioning so you can nudge a view to the left, right, etc until it’s *just right*) at runtime, so at least you don’t have to nudge a frame’s value, compile, run, check, repeat until correct.
